How to display Distance Measurements on Serial Monitor from two ultrasonic sensors on Arduino!
During my college years, I came to know Arduino microcontrollers which helped me to make complex circuits with different things like LED, buzzer, etc. Also in my childhood, I used to play around with these kinds of stuff like motors, batteries and make small circuits. I used to get excited doing things like this in my free time.
However, with the introduction of the Arduino, things became a lot easier and several models could be made both on a small and large scale using Arduino. For beginners, I would request you to buy an Arduino starter kit which might include all the required materials for this prototype. As you know that nothing would be easy at the beginning. So in that way, even getting used to Arduino, the code and the connections would be a bit hard in the beginning. I wish that the below-mentioned prototype would be a great start for beginners to learn the connections and understand the coding that goes within the Arduino.
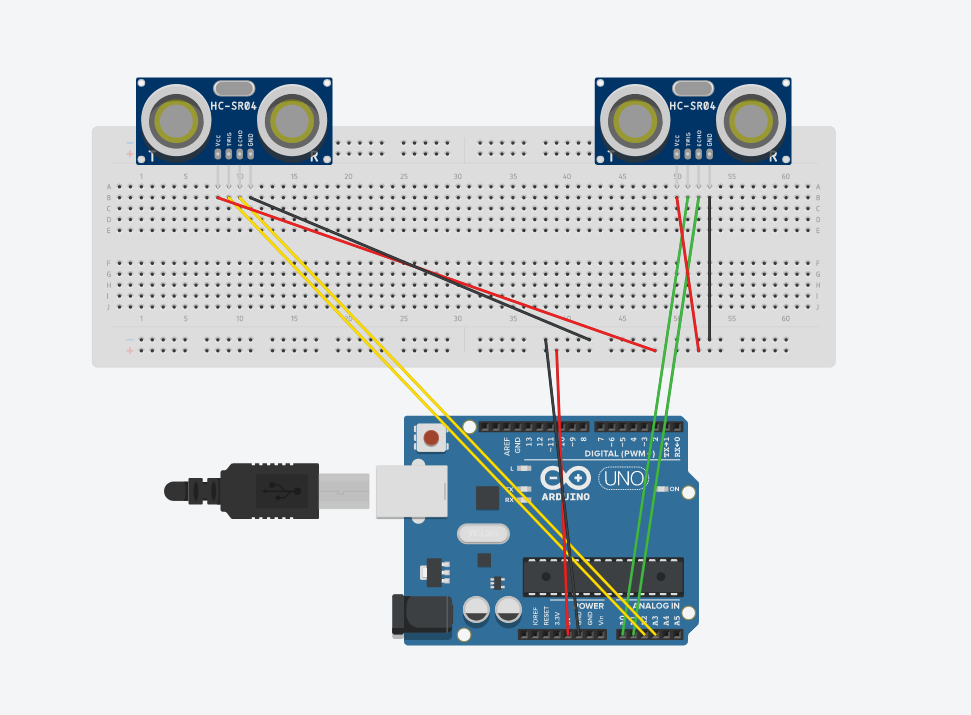
The materials that we require for this prototype are two ultrasonic sensors(HC-SR04), jumper wires, a breadboard, and an Arduino Uno.
Leaning towards the code, it’s so simple. First, we define all the analog pins and then initialize all the variables. Now, then the two main methods void setup and void loop are set up. Following this, we create a method SonarSensor with two parameters which helps us to get the distance measurements.
Going on the connections part, one of the connections is made from 5V to the positive rail and the second one from ground to the negative rail. All other connections are done to the analog pins from the ultrasonic sensors.
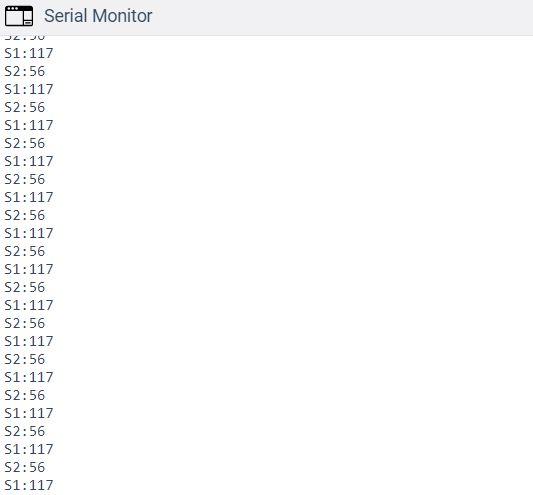
After doing all the connections as per the circuit diagram below, we can connect the Arduino to the PC, and with the Arduino IDE software, you can upload the code given below. For beginners again, don’t forget to select the proper model and choose the right port under the appropriate section on the Arduino IDE software. Eventually, you will be able to view both the distance measurements separately as S1 and S2 on the Serial Monitor on the Arduino IDE software. For the beginners again, the Arduino board can be standalone after uploading the code you just need an electricity source like a power bank to power it up.
Overview – In this undertaking, we will utilize two ultrasonic sensors(HC-SR04) to quantify distance and yield it on the chronic screen.
Circuit Diagram
Serial Monitor Output
Note
Check whether all pins are connected in proper positions.
Code
 #define trigPin1 A0
 #define echoPin1 A1
 #define trigPin2 A2
 #define echoPin2 A3
 int duration, distance, FIRSTSensor, SECONDSensor;
 void setup()
 {
  Serial.begin (9600);
  pinMode(trigPin1, OUTPUT);
  pinMode(echoPin1, INPUT);
  pinMode(trigPin2, OUTPUT);
  pinMode(echoPin2, INPUT);
 }
 void loop()
 {
  SonarSensor(trigPin1, echoPin1);
  FIRSTSensor = distance;
  SonarSensor(trigPin2, echoPin2);
  SECONDSensor = distance;
  Serial.print("S1:"); Serial.println(FIRSTSensor); delayMicroseconds(10);
  Serial.print("S2:"); Serial.println(SECONDSensor); delayMicroseconds(10);
 }
 void SonarSensor(int trigPin, int echoPin)
 {
  digitalWrite(trigPin, LOW);
  delayMicroseconds(2);
  digitalWrite(trigPin, HIGH);
  delayMicroseconds(10);
  digitalWrite(trigPin, LOW);
  duration = pulseIn(echoPin, HIGH);
  distance = (duration / 2) / 29.1;
 }
