Seven Segment Display Counter using Push Button on Arduino!
During these times of emerging technologies, we come to know about Arduino microcontrollers which enable the future generation of students and engineers to make their lives easier. Arduino microcontrollers help us make complex circuits faster without any complexity. When I was a kid, I used to play with motors, batteries and make simple and small circuits.
With the arrival of Arduino into the market, things got a lot more easier than before large-scale and small-scale prototypes could be built with ease. For those who are new to this, I recommend you guys to buy an Arduino starter kit which almost has all items needed for this project. We all know that everything at first would be hard and difficult. In the same way, even getting adapted with Arduino, the connections would be a bit difficult. I really hope that this project would be a great chance to learn and the connections and explore more on the way how the code works on the Arduino board.
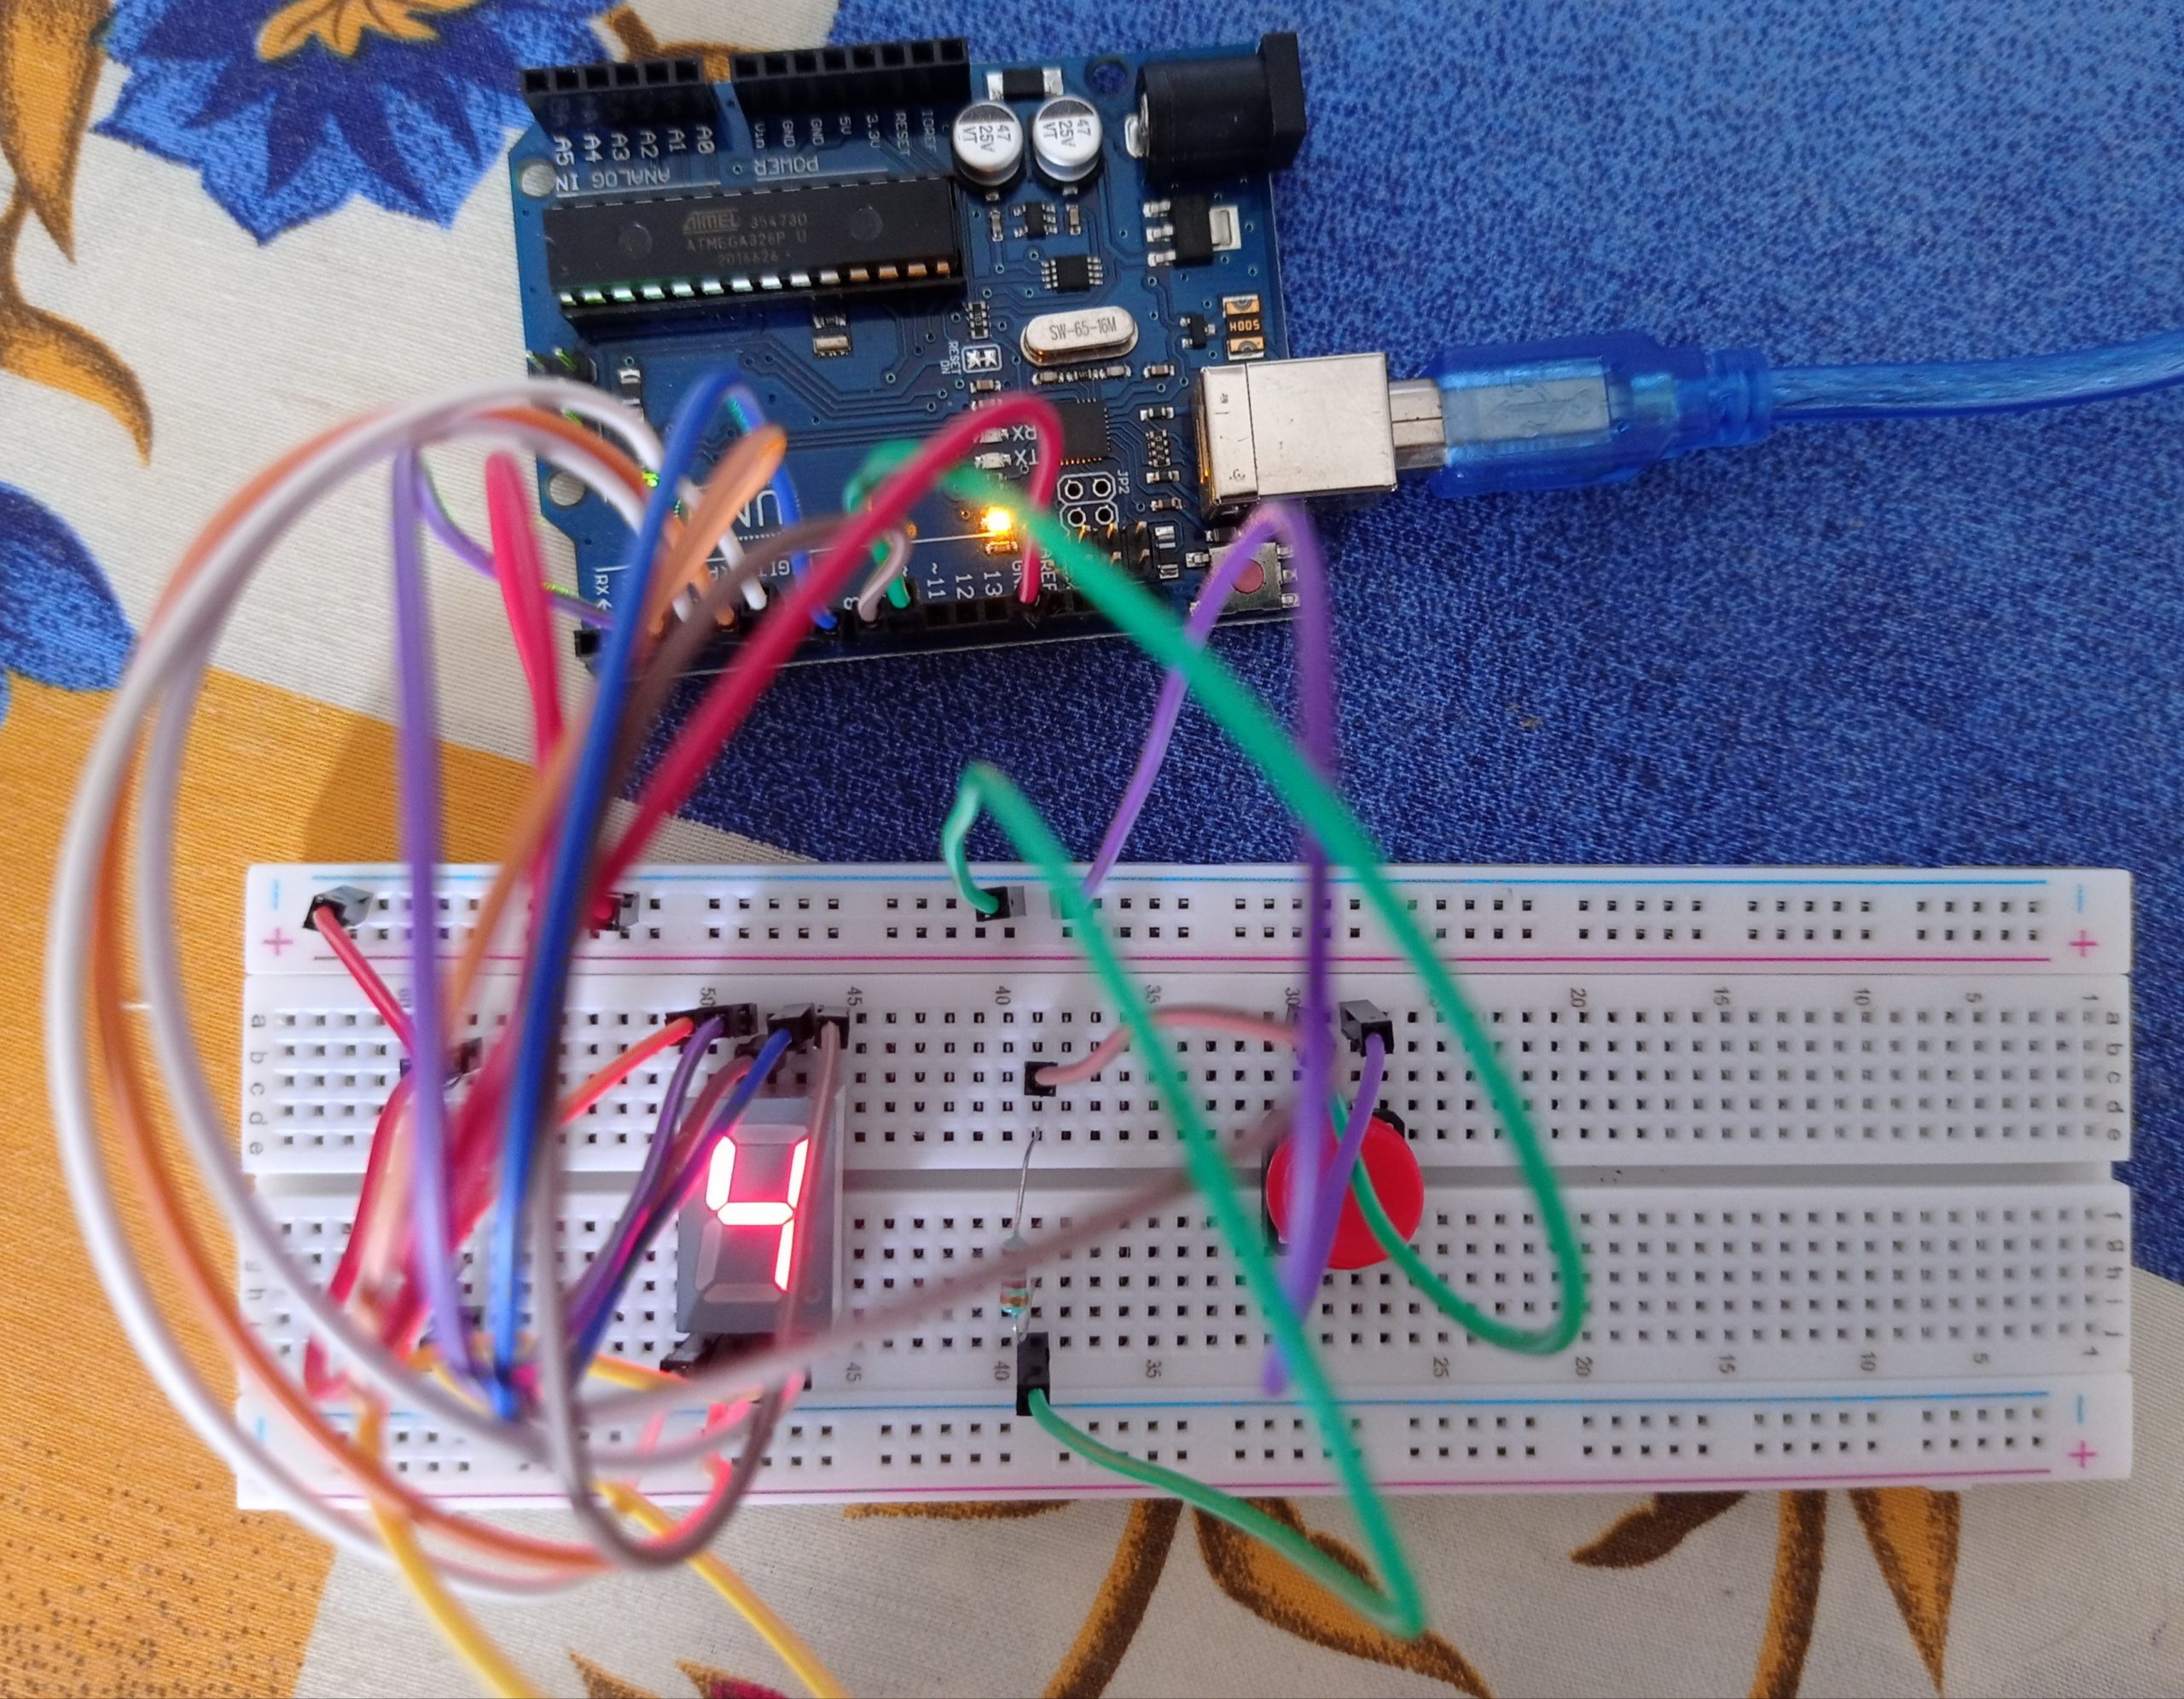
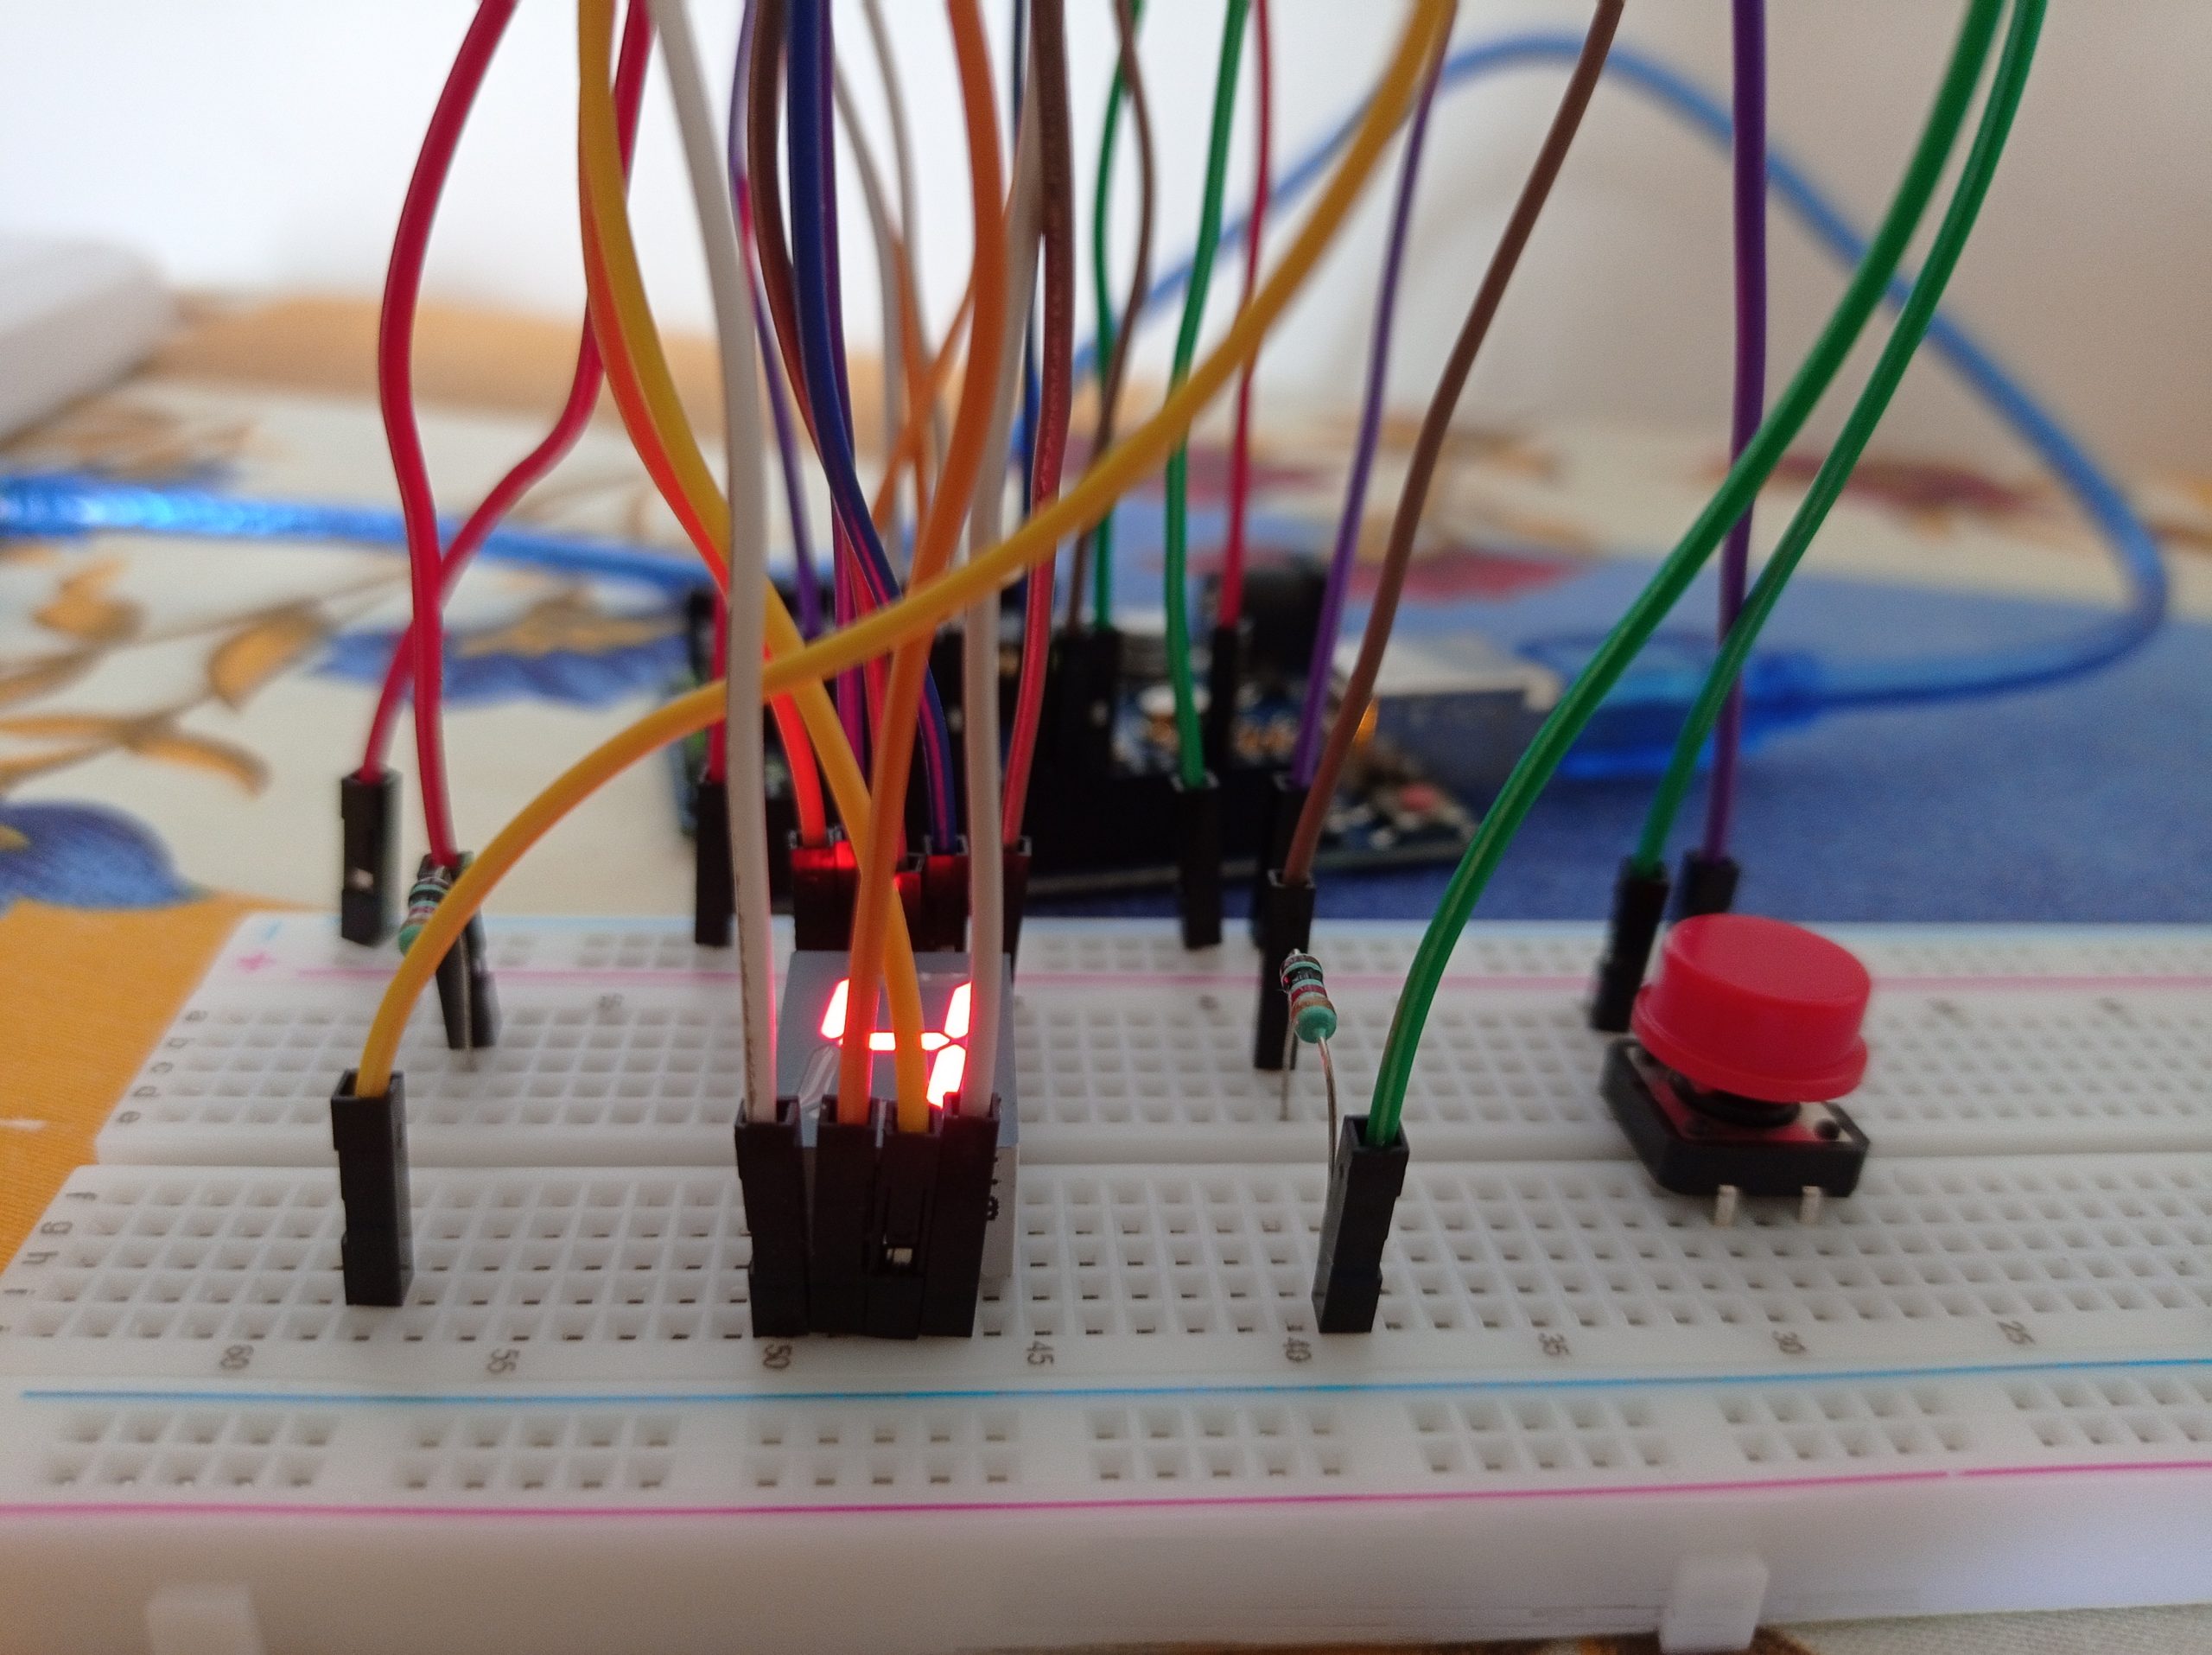
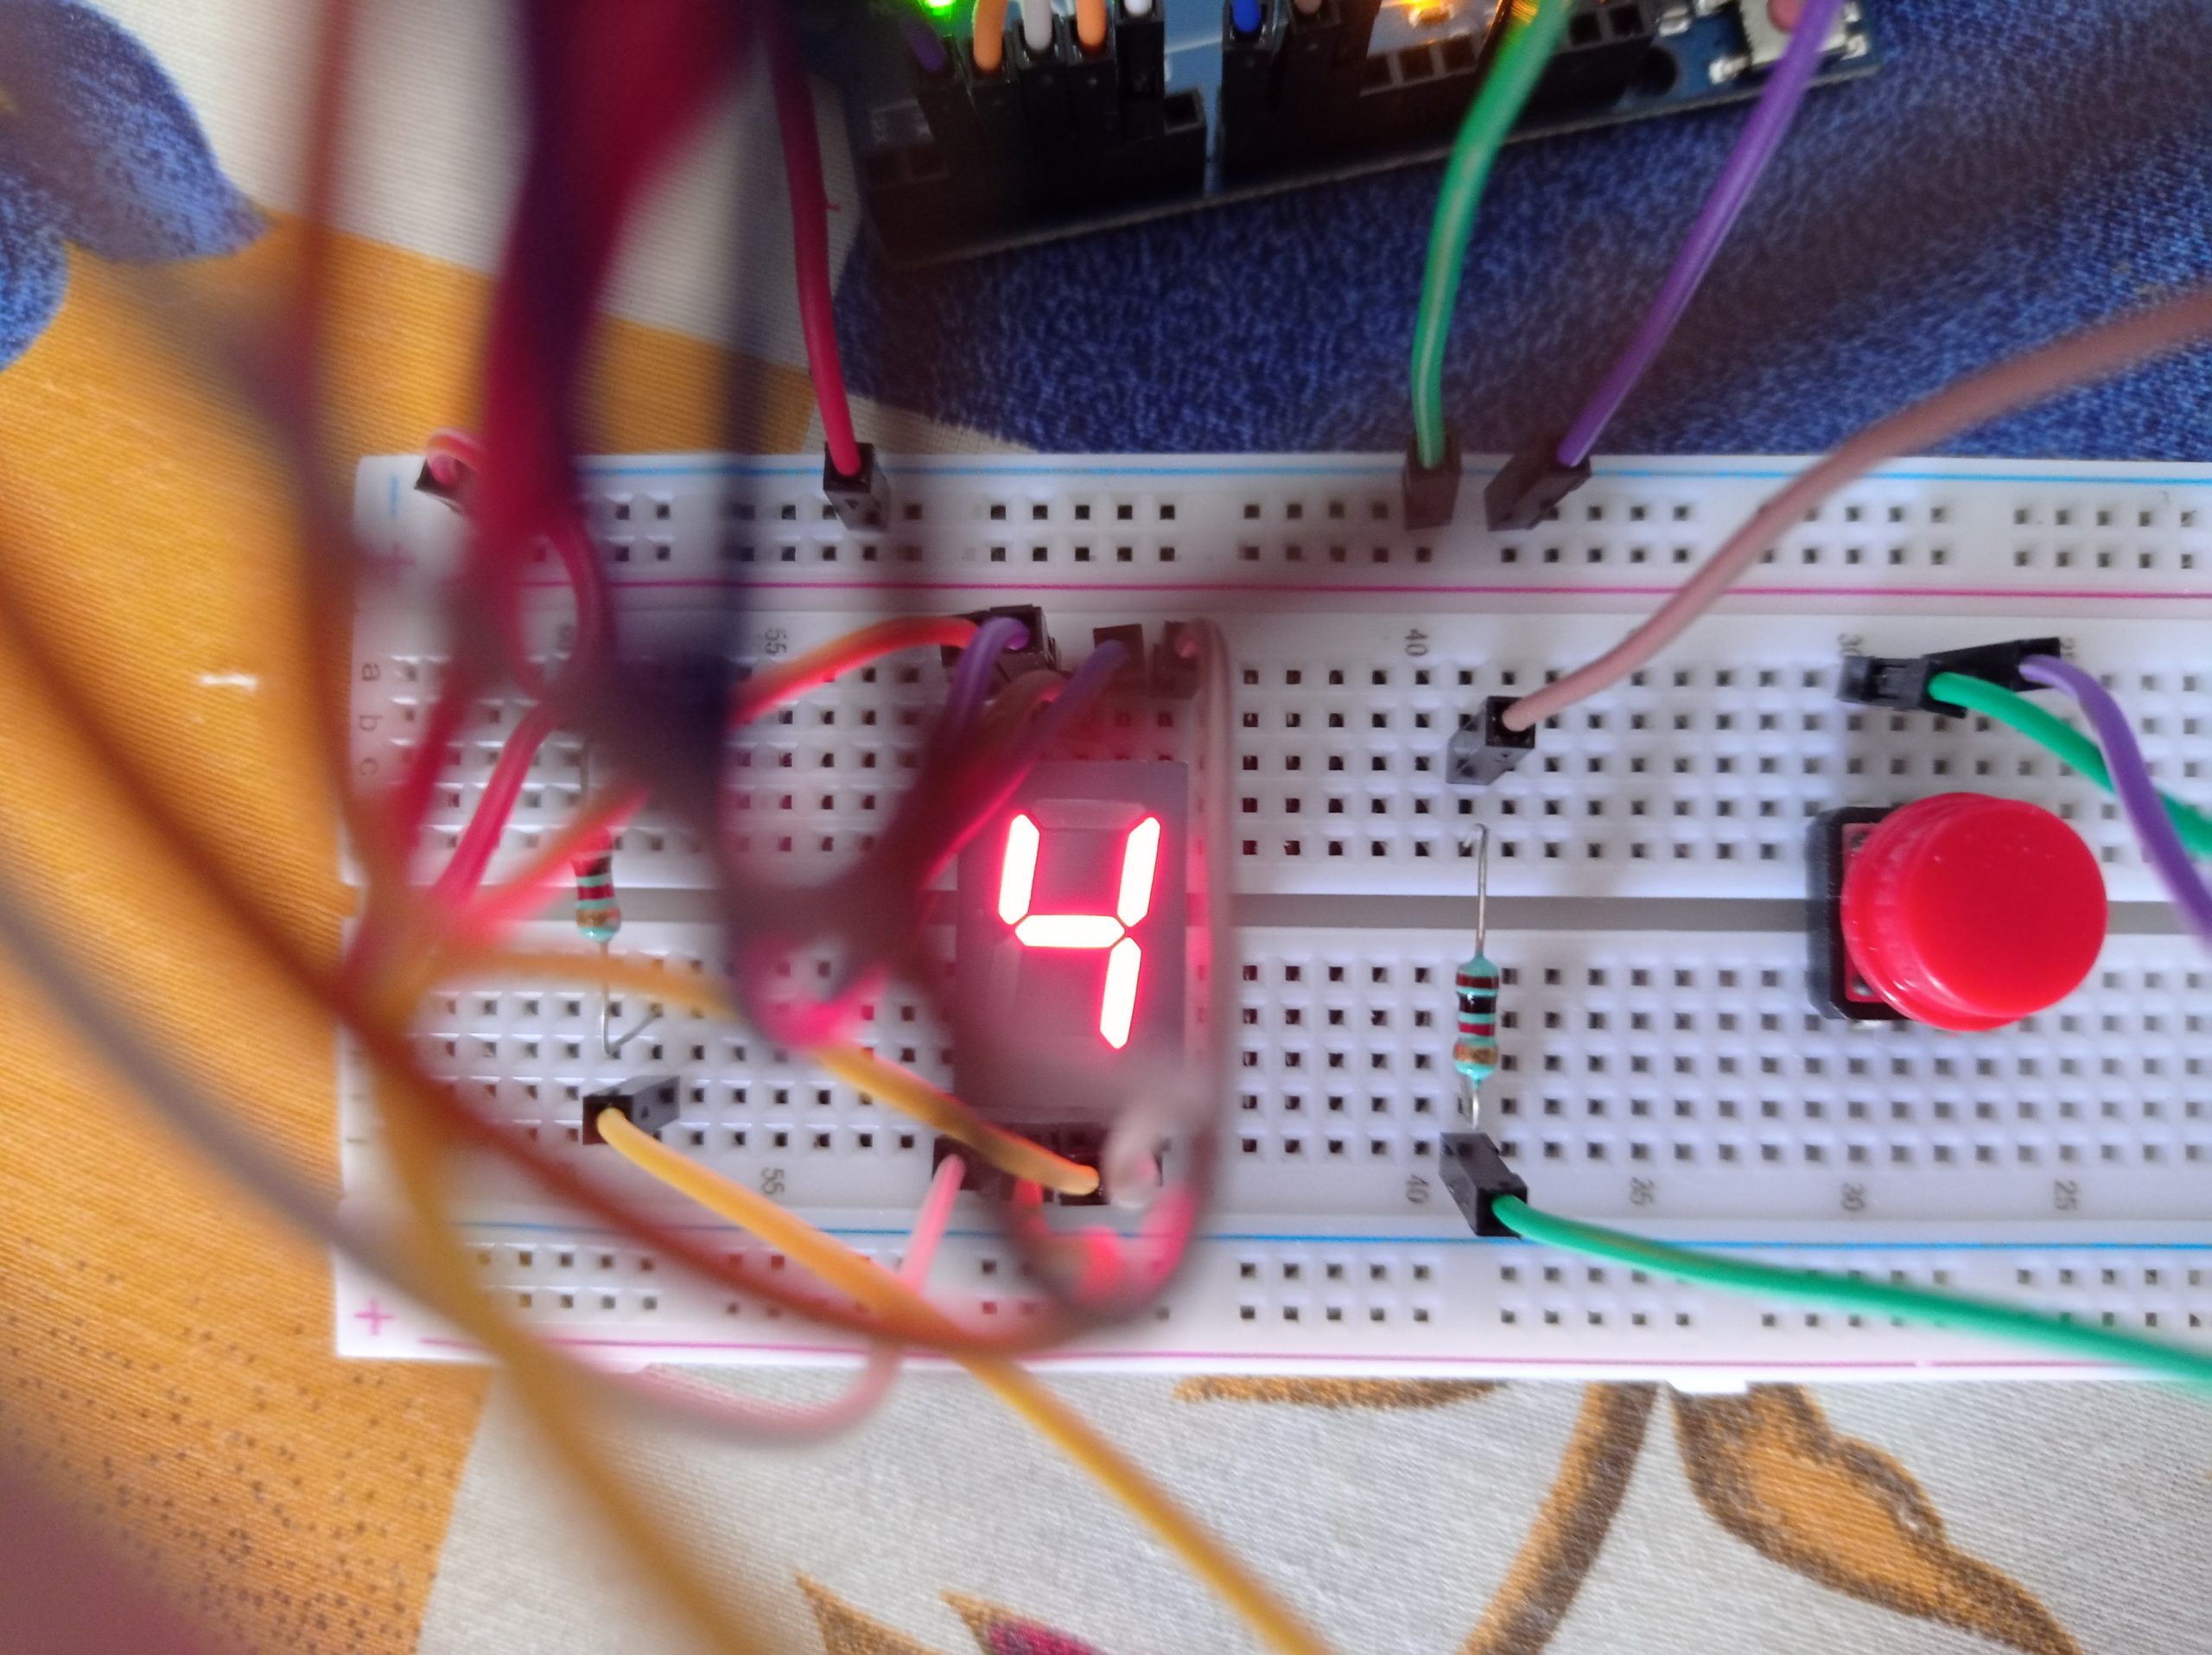
The parts required for this project are jumper wires, a single digit seven segment display, an Arduino Uno, a push button, a breadboard, and some resistors.
Coming towards the code, it seems pretty simple. First, all the variables are initialized. Then the two main methods are setup void loop and void setup. Next, we set up the displayDigit method with the digit as the parameter which displays the digit accordingly as per the input. Over to the turnOff method which turns off the display by turning off all the LEDs over the display. Both of these methods are in use under the void loop method.
Talking about the connections, one connection is done between the ground on the board and the negative rail of the breadboard. Other connections are done directly or indirectly with resistors to the single-digit seven-segment display.
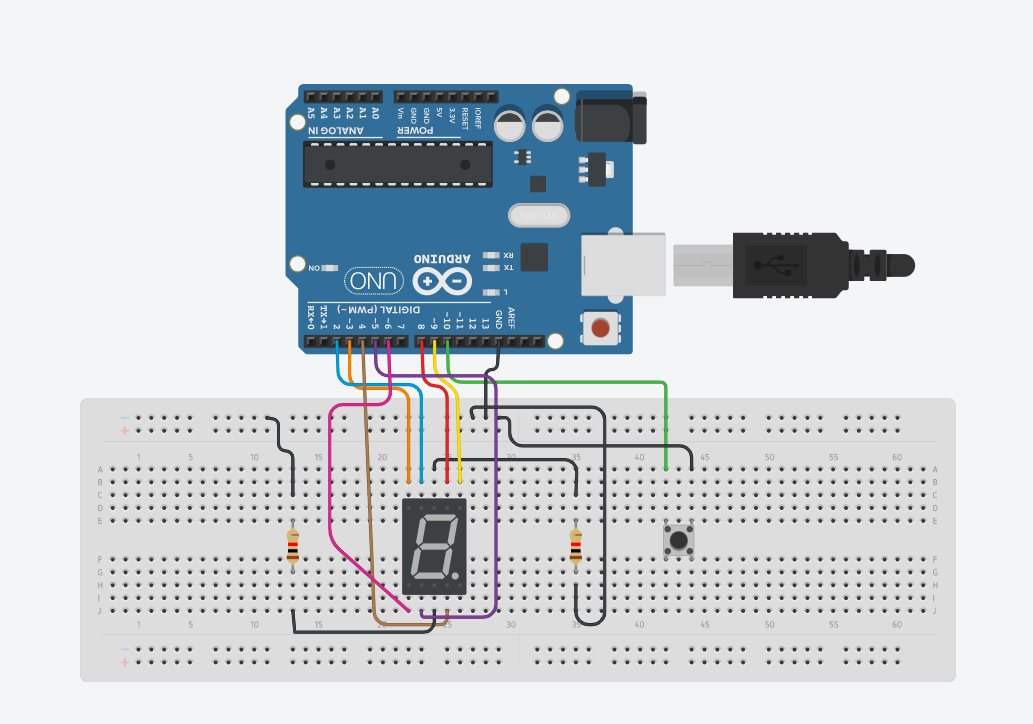
On completion of all the connections as per the circuit diagram given below, you can connect the Arduino board to the computer, and then the code given below could be uploaded to the Arduino board using the Arduino IDE software. For starters, please do select the proper model of the Arduino board and choose the right port under the options in the Arduino IDE software. Finally, you can proceed to press the push button and the single-digit seven segment display will work as a counter. Again, for the starters out there, after uploading the code to the Arduino board you can just power up the Arduino board using a power source and it will work.
Overview – In this project, we will be using a seven-segment display and a push-button to make a counter(0-9).
Circuit
Circuit Diagram
Note
Both the resistors above are 1K ohm resistors. Also check whether all pins are connected in proper positions.
Code
 const int a = 8; //For displaying segment “a”
 const int b = 9; //For displaying segment “b”
 const int c = 4; //For displaying segment “c”
 const int d = 5; //For displaying segment “d”
 const int e = 6; //For displaying segment “e”
 const int f = 2; //For displaying segment “f”
 const int g = 3; //For displaying segment “g”
 bool bPress = false;
 const int buttonPin = 10;
 // Variables will change:
 int buttonPushCounter = 0; // counter for the number of button presses
 int buttonState = 0; // current state of the button
 int lastButtonState = 0; // previous state of the button
 void setup() {
  // put your setup code here, to run once:
  pinMode(a, OUTPUT); //A
  pinMode(b, OUTPUT); //B
  pinMode(c, OUTPUT); //C
  pinMode(d, OUTPUT); //D
  pinMode(e, OUTPUT); //E
  pinMode(f, OUTPUT); //F
  pinMode(g, OUTPUT); //G
  pinMode( buttonPin , INPUT_PULLUP );
  Serial.begin(9600);
  displayDigit(buttonPushCounter);
 }
 void loop() {
  buttonState = digitalRead(buttonPin);
  // compare the buttonState to its previous state
  if (buttonState != lastButtonState) {
   // if the state has changed, increment the counter
   if (buttonState == LOW) {
    // if the current state is HIGH then the button went from off to on:
    bPress = true;
    buttonPushCounter++;
    if ( buttonPushCounter > 9) buttonPushCounter = 0 ;
    Serial.println("on");
   } else {
    // if the current state is LOW then the button went from on to off:
    Serial.println("off");
   }
   // Delay a little bit to avoid bouncing
   delay(50);
  }
  // save the current state as the last state, for next time through the loop
  lastButtonState = buttonState;
  if ( bPress ) {
   turnOff();
   displayDigit(buttonPushCounter);
  }
 }
 void displayDigit(int digit)
 {
  //Conditions for displaying segment a
  if (digit != 1 && digit != 4)
   digitalWrite(a, HIGH);
  //Conditions for displaying segment b
  if (digit != 5 && digit != 6)
   digitalWrite(b, HIGH);
  //Conditions for displaying segment c
  if (digit != 2)
   digitalWrite(c, HIGH);
  //Conditions for displaying segment d
  if (digit != 1 && digit != 4 && digit != 7)
   digitalWrite(d, HIGH);
  //Conditions for displaying segment e
  if (digit == 2 || digit == 6 || digit == 8 || digit == 0)
   digitalWrite(e, HIGH);
  //Conditions for displaying segment f
  if (digit != 1 && digit != 2 && digit != 3 && digit != 7)
   digitalWrite(f, HIGH);
  //Conditions for displaying segment g
  if (digit != 0 && digit != 1 && digit != 7)
   digitalWrite(g, HIGH);
 }
 void turnOff()
 {
  digitalWrite(a, LOW);
  digitalWrite(b, LOW);
  digitalWrite(c, LOW);
  digitalWrite(d, LOW);
  digitalWrite(e, LOW);
  digitalWrite(f, LOW);
  digitalWrite(g, LOW);
 }
