How to display temperature(with thermistor) out to LCD display on Arduino!
As a kid, I always used to do things like playing with motors, make simple circuits with switches, etc. When I grew up I came to know about Arduino microcontrollers which enable us to create complex circuits with various elements like LED, buzzer, etc.
With Arduino, several prototypes can be made on both a large scale and a small scale. For starters, I would recommend buying an Arduino UNO starter kit which mostly contains all the requirements for this project. Anything in beginning will be hard and difficult. Likewise even using Arduino, the connections and code may not be easy in the beginning. So, I think that the project below is a great start-up for beginners to learn and understand the connections and the coding that goes to the Arduino.
For this project, the materials required are Arduino Uno, jumper wires, breadboard, few resistors, a potentiometer, a thermistor, and an LCD display.
Coming to the code part, it’s simple. First, I have imported the Liquid Crystal which is required for using the LCD display. Then all the variables are initialized. Then I have defined the two main methods void setup and void loop.
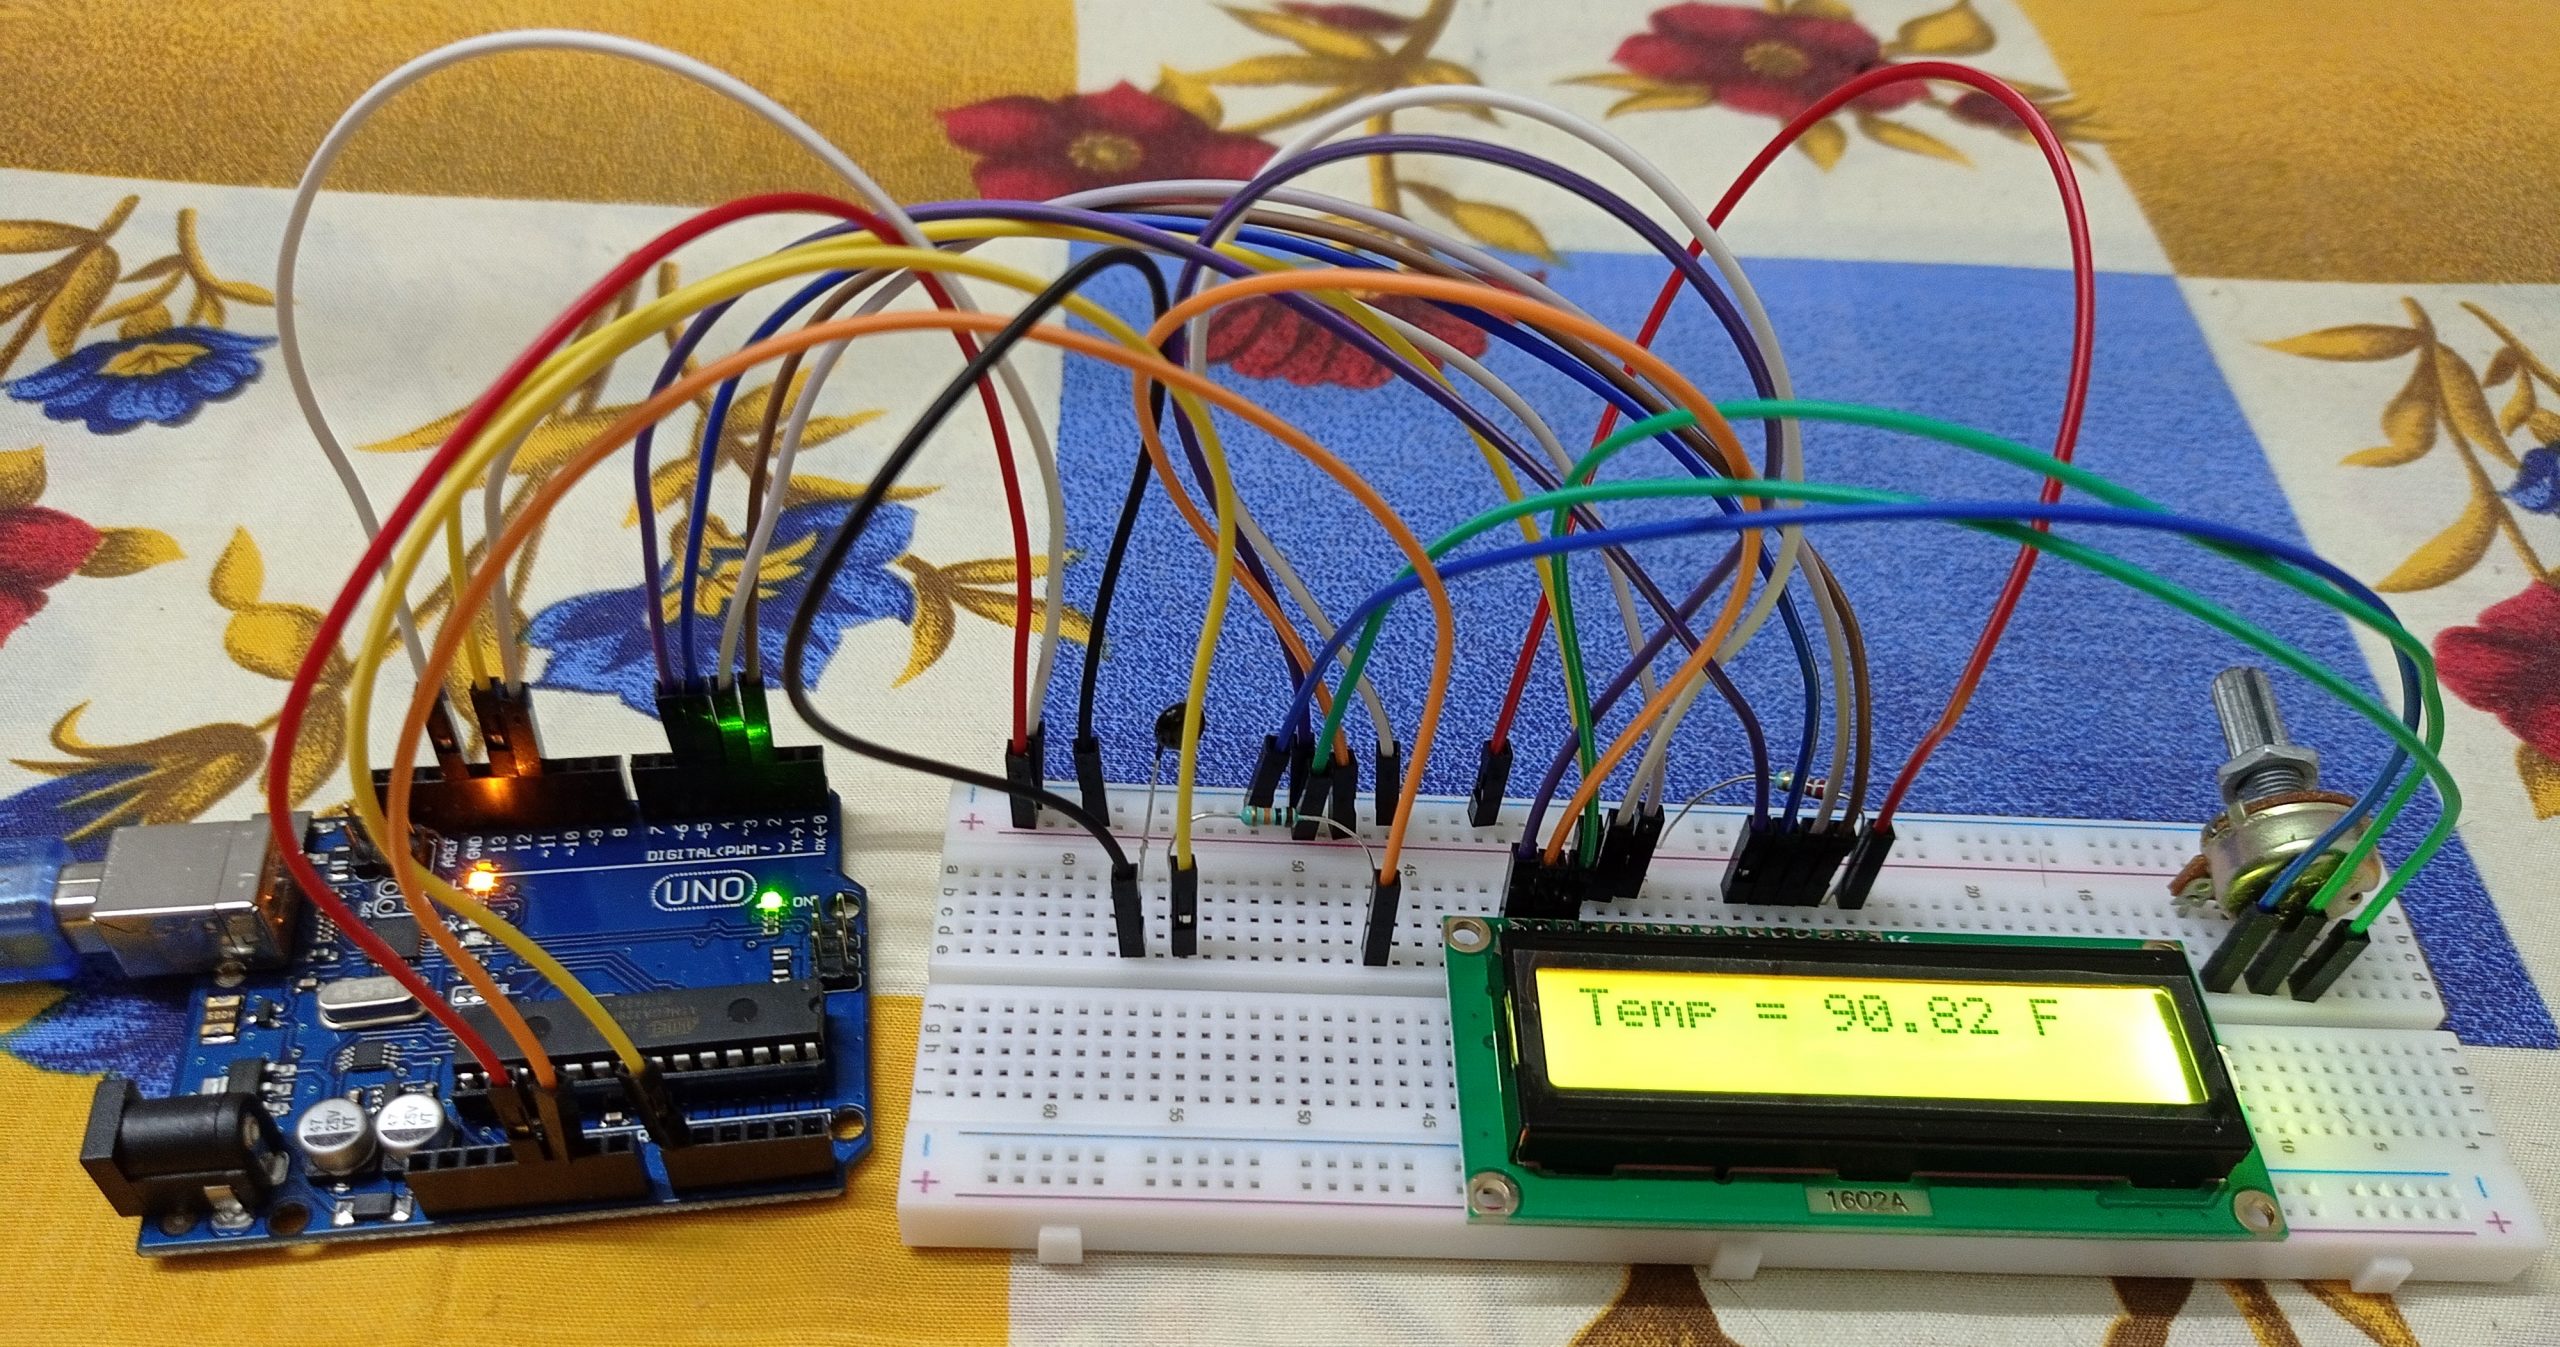
Here, we use a Thermistor to detect the temperature of the surrounding. We can connect the jumper wires to the Arduino board using the circuit diagram below.
While checking the connections, one connection is made from the ground on the board to the negative rail, and one connection from the 5V on the board to the positive rail. Then you can proceed with the individual connection as per the circuit diagram. We have a potentiometer in this circuit to set up the contrast of the LCD display so that we can view it properly.
After doing all the connections properly as per the circuit diagram, you can connect the Arduino board to the computer, and using the Arduino IDE software you can upload the code given below. If this is your first time using Arduino IDE software, do choose the right model of your Arduino and choose the right port under appropriate options in the IDE. Finally, you would be able to view the temperature on the LCD display. For beginners again, you may not need to be connected to the laptop after uploading the code to the board, you can just use a power source like a power bank.
Overview – In this project, we will be using a 10K thermistor to measure the temperature and display out in LCD display.
Circuit
Circuit Diagram
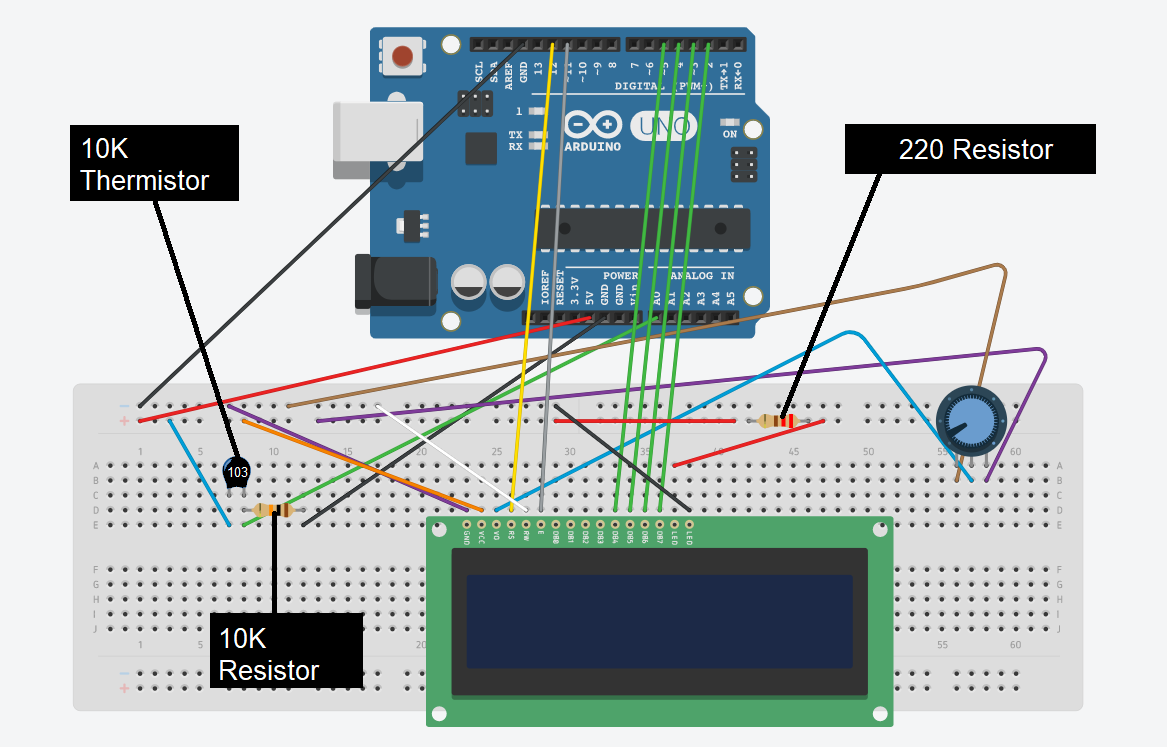
Note
You should have LiquidCrystal library added to your libraries in order to upload the code. Also check whether all pins are connected in proper positions.
Code
 #include <LiquidCrystal.h>
 int ThermistorPin = 0;
 int Vo;
 float R1 = 10000;
 float logR2, R2, T;
 float c1 = 1.009249522e-03, c2 = 2.378405444e-04, c3 = 2.019202697e-07;
 LiquidCrystal lcd(12, 11, 5, 4, 3, 2);
 void setup() {
  Serial.begin(9600);
 }
 void loop() {
  Vo = analogRead(ThermistorPin);
  R2 = R1 * (1023.0 / (float)Vo - 1.0);
  logR2 = log(R2);
  T = (1.0 / (c1 + c2 * logR2 + c3 * logR2 * logR2 * logR2));
  T = T - 273.15;
  T = (T * 9.0) / 5.0 + 32.0;
  lcd.print("Temp = ");
  lcd.print(T);
  lcd.print(" F");
  delay(500);
  lcd.clear();
 }
