How to control LEDs with RFID Tag on Arduino!
Ever thought of making a RFID Access Control yourself? Then you have landed in the right area. Now with the help of Arduino, it becomes simple and for the ones who don’t know what an Arduino is, it’s a microcontroller that has reduced all the complexity which we have faced before. Nowadays, it’s been used by students in various fields.
Recently, Arduino is being utilized on both huge and small scales. Again for those who are new to this, I recommend you to purchase an Arduino starter kit which usually will have all the stuff required for this project today. Everything doesn’t become simple on its own without effort. In a similar situation, even getting adjusted with Arduino and the connections would be difficult. I really expect that this project would be a great footstep for you in this field.
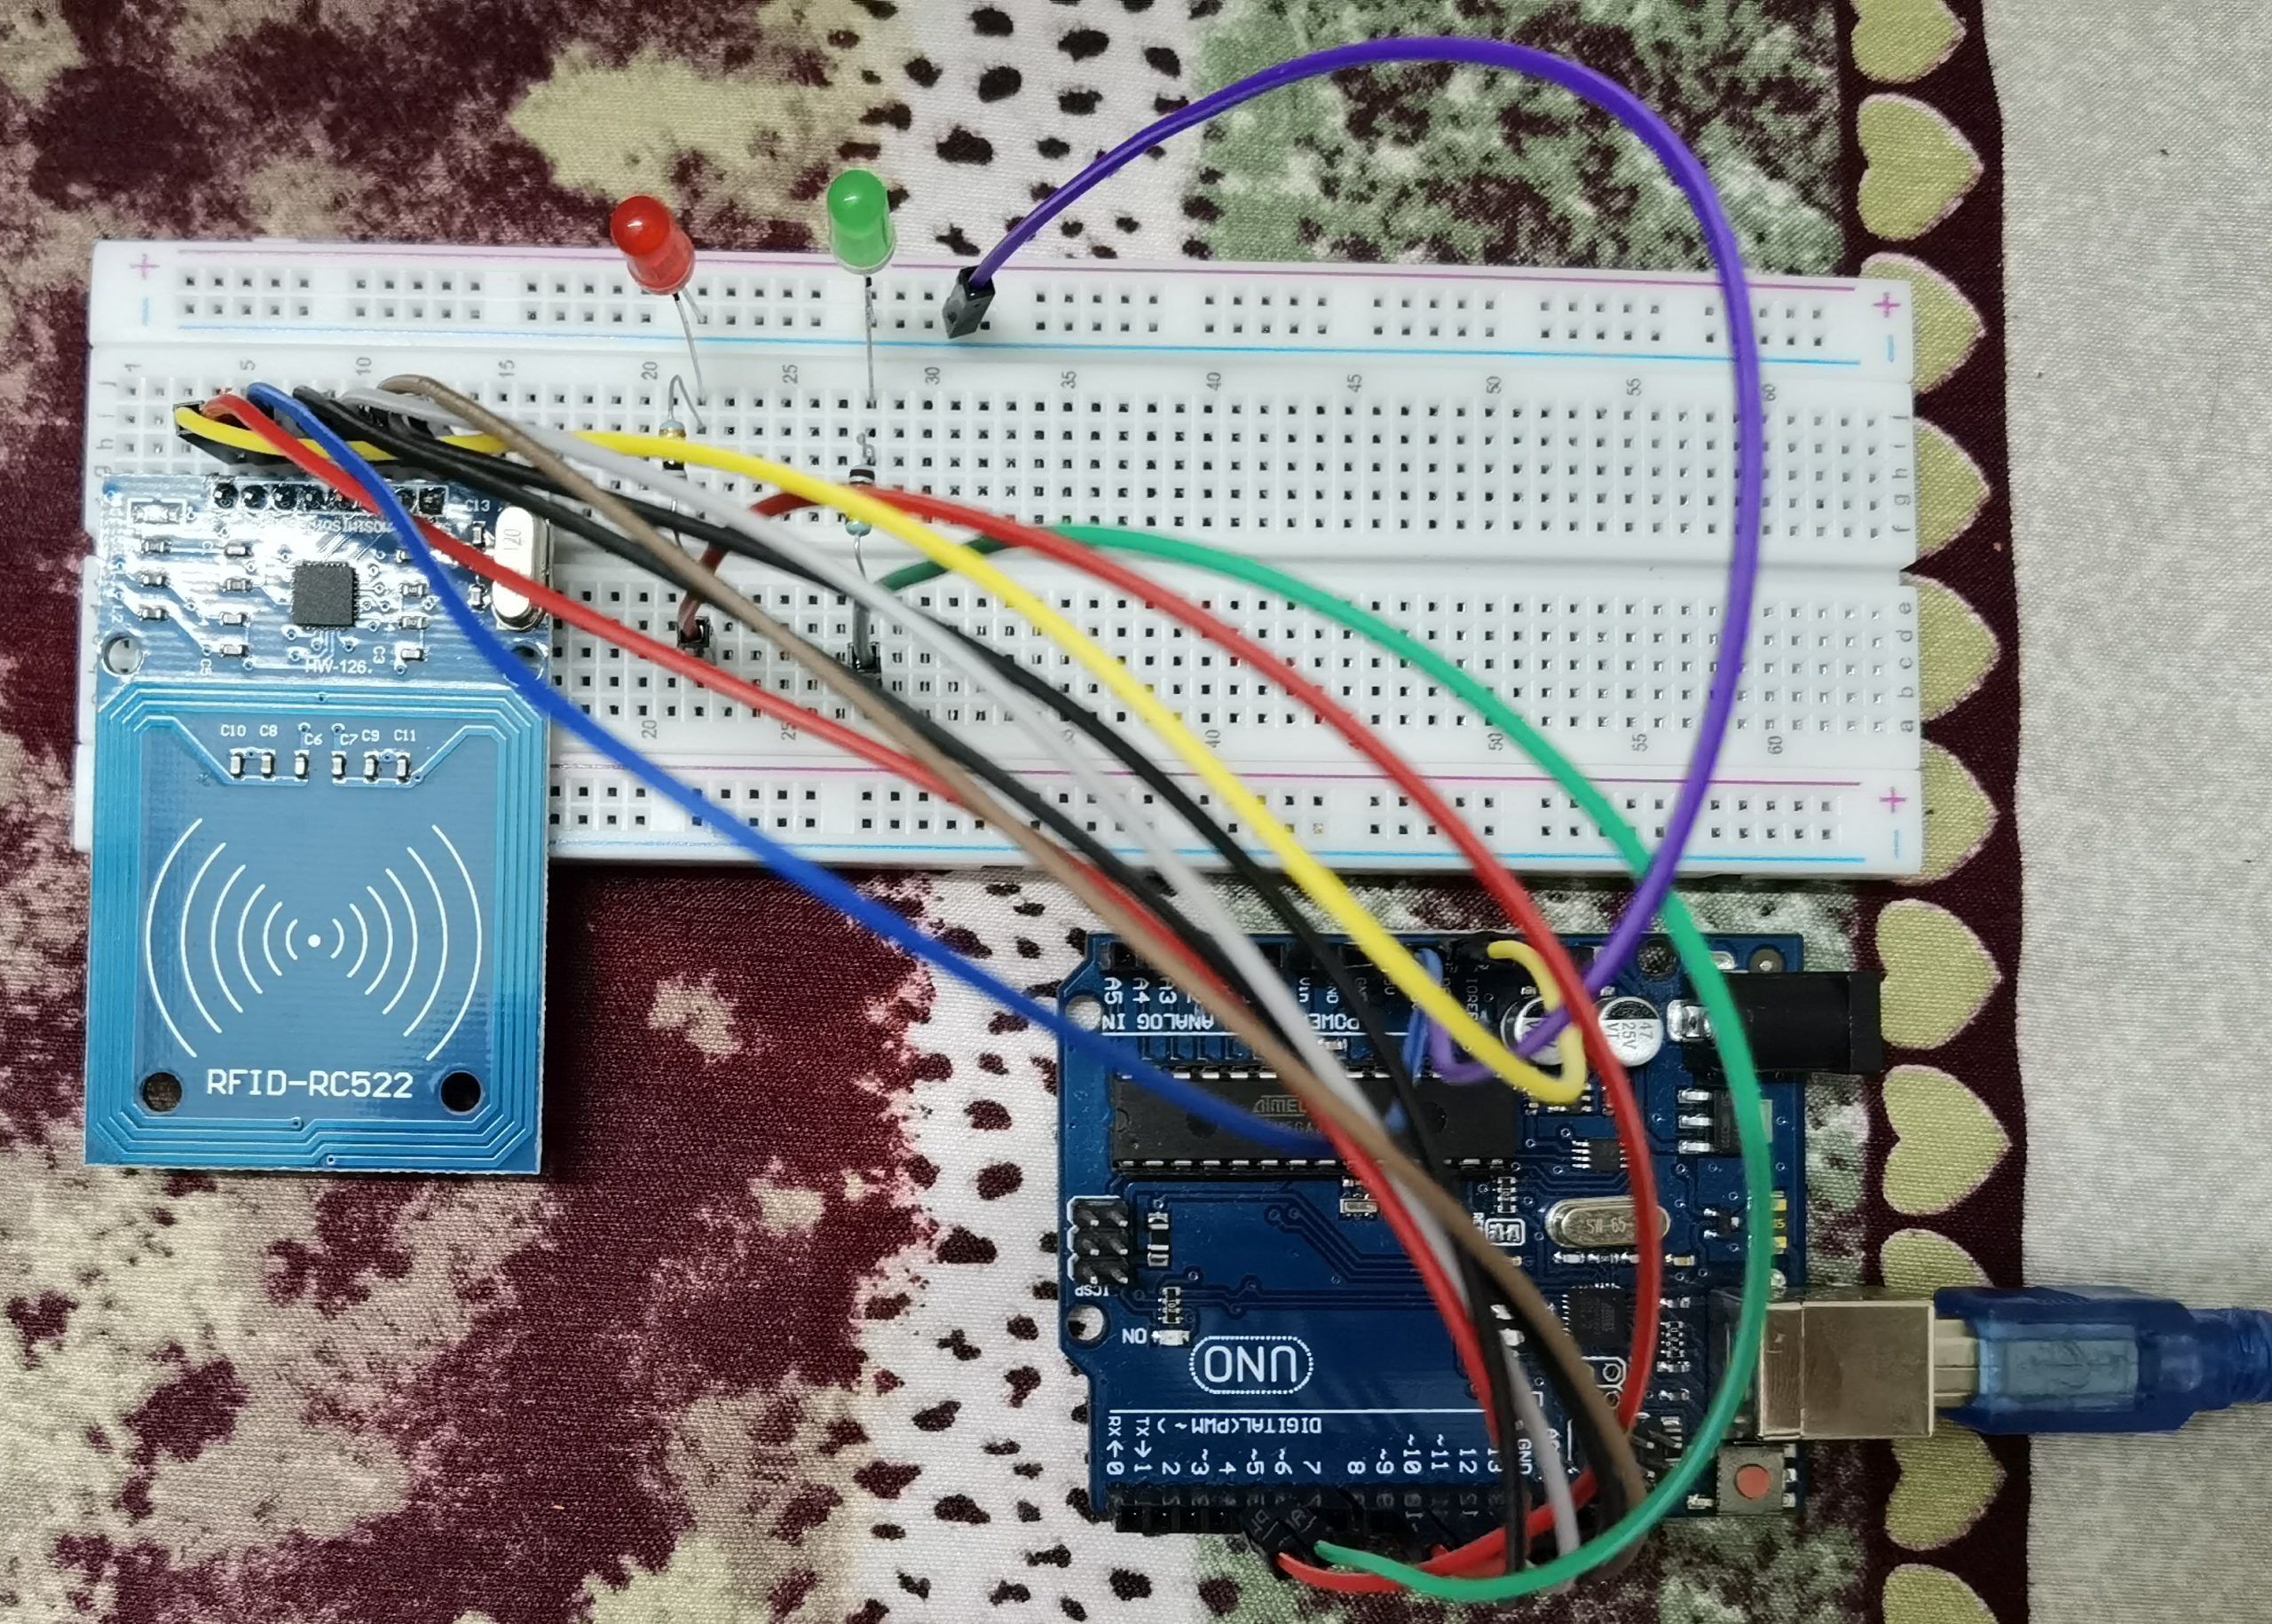
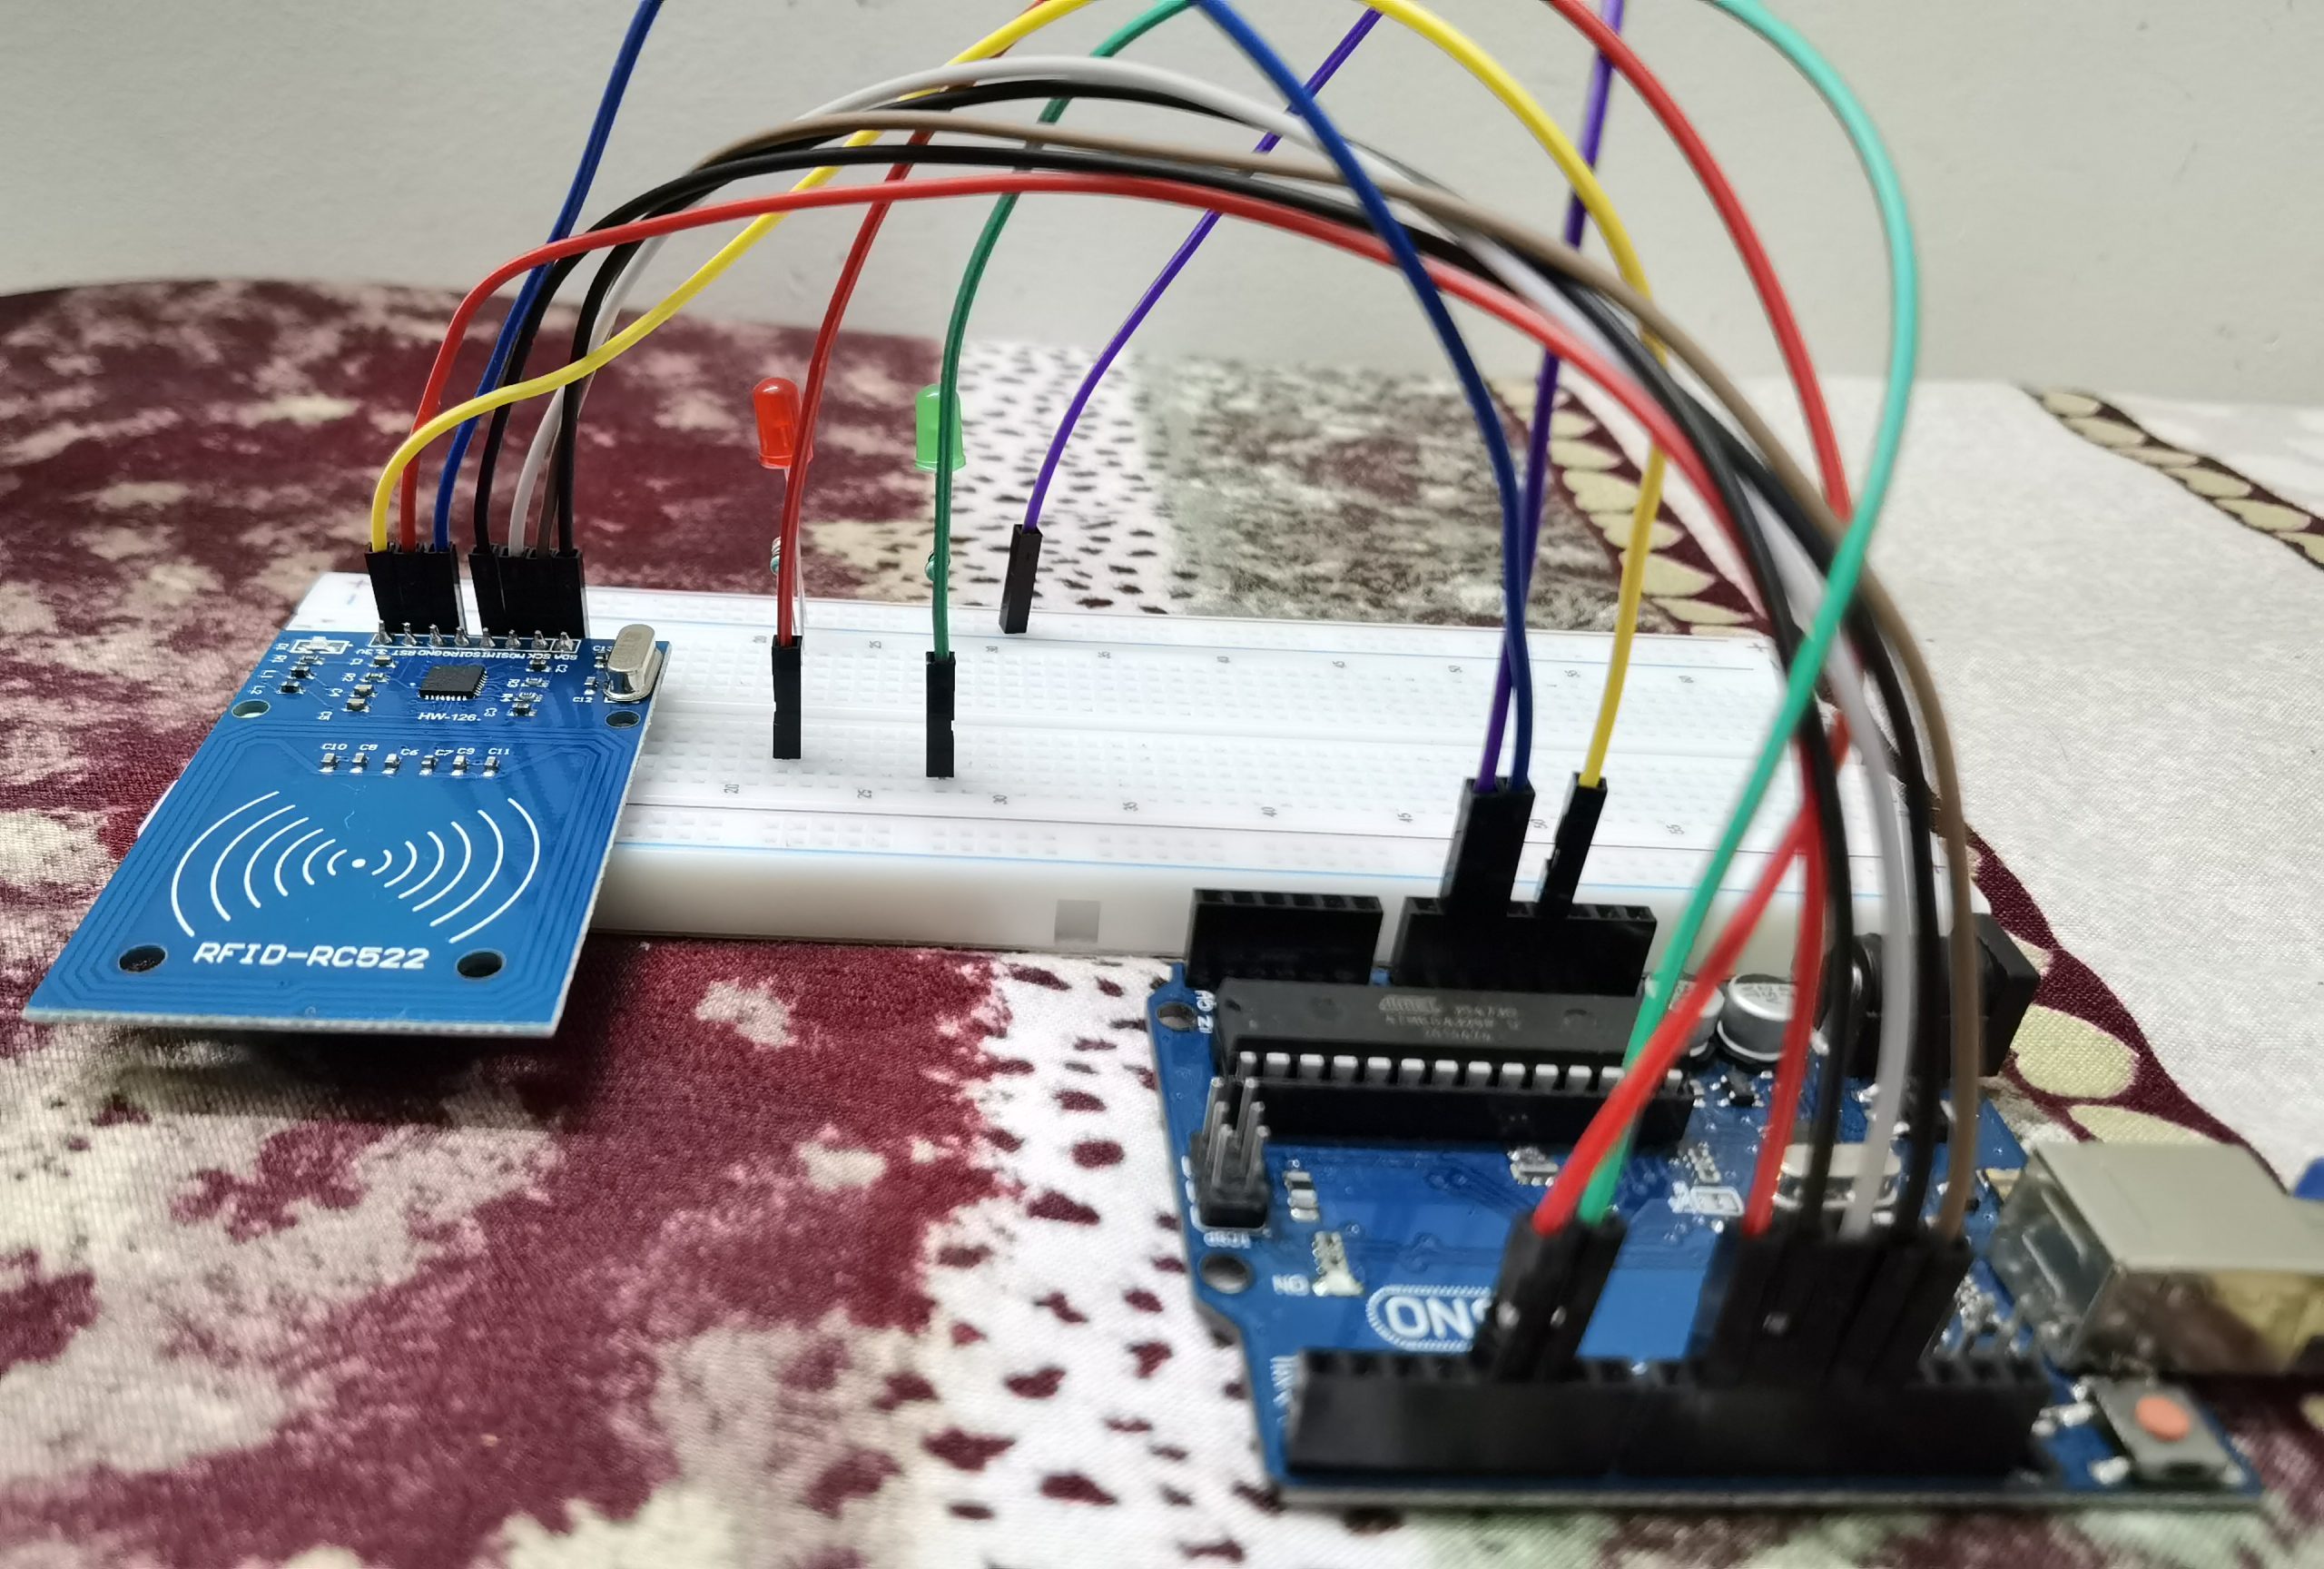
The stuffs required for this project are two LEDs of different colors, two RFID tags, a breadboard, few resistors, jumper wires, an Arduino Uno, and a RFID module.
Over to the coding part, first we have imported two libraries SPI and MFRC522 which help us to use the RFID module. Now we have initialized all the variables. Following this, we set up the two main methods void setup and void loop.
Those who have already UID for the RFID tag that you need to give access can skip this part. After finishing up all the circuit connections properly, connect the Arduino board to the computer, then go to File – Examples – MFRC522 – DumpInfo and upload the code using the Arduino IDE software. To get the UID now place the specific RFID tag that you need to provide access. Now, you would be able to see the UID of that RFID tag on the Serial Monitor within the Arduino IDE.
You can proceed after without making any changes to the connection. Now replace the UID of the RFID tag that you want to grant access in the code given below. At last, you can upload this edited code to the Arduino board via the Arduino IDE software. Now, when you place the RFID tag that gave you access on the RFID module, then the green LED will glow and displays “Authorized Access” on the Serial Monitor. When you place other RFID tags, the red LED will glow and displays “Access Denied” on the Serial Monitor.
Overview – In this venture, we will utilize a RFID module and RFID tag to control the LEDs.
Note
You should have SPI and MFRC522 libraries added to your libraries in order to upload the code. 1K resistors are used in this project. Before you start, you should have UID for your RFID tag.
For getting UID for your RFID tag, go to File < Examples < MFRC522 < DumpInfo and upload the code. Now place the RFID tag on the RFID module to get the UID on Serial Monitor.
Then change the UID on the main code. Also check whether all pins are connected in proper positions.
Circuit
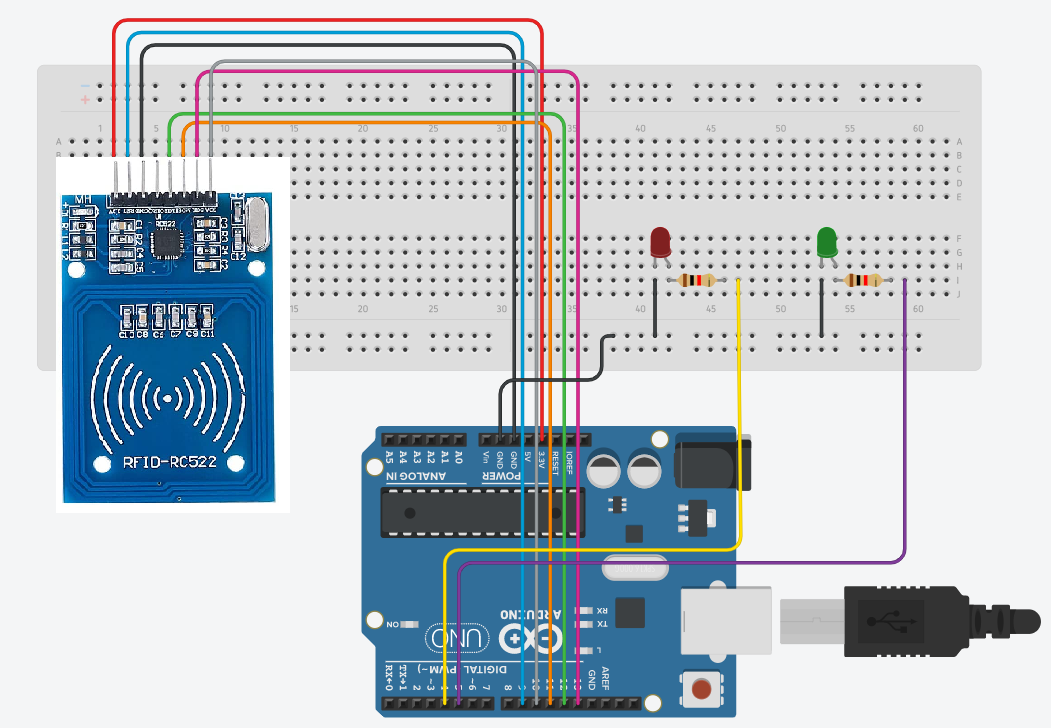
Circuit Diagram
Code
 #include <SPI.h>
 #include <MFRC522.h>
 #define SS_PIN 10
 #define RST_PIN 9
 #define LED_G 5
 #define LED_R 4
 MFRC522 mfrc522(SS_PIN, RST_PIN);
 void setup()
 {
  Serial.begin(9600);  // Initiate a serial communication
  SPI.begin();   // Initiate SPI bus
  mfrc522.PCD_Init();  // Initiate MFRC522
  pinMode(LED_G, OUTPUT);
  pinMode(LED_R, OUTPUT);
  Serial.println("Put your card to the reader...");
  Serial.println();
 }
 void loop()
 {
  // Look for new cards
  if ( ! mfrc522.PICC_IsNewCardPresent())
  {
   return;
  }
  // Select one of the cards
  if ( ! mfrc522.PICC_ReadCardSerial())
  {
   return;
  }
  //Show UID on serial monitor
  Serial.print("UID tag :");
  String content = "";
  byte letter;
  for (byte i = 0; i < mfrc522.uid.size; i++)
  {
   Serial.print(mfrc522.uid.uidByte[i] < 0x10 ? " 0" : " ");
   Serial.print(mfrc522.uid.uidByte[i], HEX);
   content.concat(String(mfrc522.uid.uidByte[i] < 0x10 ? " 0" : " "));
   content.concat(String(mfrc522.uid.uidByte[i], HEX));
  }
  Serial.println();
  Serial.print("Message : ");
  content.toUpperCase();
  if (content.substring(1) == "7A 21 1F 68") //change here the UID of the card/cards that you want to give access
  {
   Serial.println("Authorized access");
   Serial.println();
   delay(500);
   digitalWrite(LED_G, HIGH);
   delay(2000);
   digitalWrite(LED_G, LOW);
   delay(2000);
  }
  else
  {
   Serial.println(" Access denied");
   digitalWrite(LED_R, HIGH);
   delay(2000);
   digitalWrite(LED_R, LOW);
   delay(2000);
  }
 }
